Shopping Cart
0 item(s) - $0.00- Pond Sealant
- Aeration Systems
- Air Pumps & Compressors
- Algae Control
- Algaecides & Herbicides
- Bacteria & Clarifiers
- DC Compressors & 12V Pumps
- Diffusers & Airstones
- Dock Bubblers & Deicers
- Dyes & Colorants
- Fountains
- Large Ponds & Lakes
- Muck Removal
- Nozzles & Fountain Heads
- Pond Liner
- Pond Pumps
- Tubing & Accessories
- Water Level Control & Gates
- Water Treatments
- Windmill Aeration
- Commercial & Industrial Supplies
- Solar Aeration
-
Information & Articles
- - Aeration: The Key To Success
- - Air Compressors: Rotary Vane
- - Air Pumps: Linear or Diaphragm
- - Airline & Tubing for Aeration Systems
- - Algae Control
- - Aquatic Plants & Weeds in Ponds
- - Building A Dock Bubbler System
- - Building A Pond: The Basic Steps
- - Calculating Dissolved Oxygen Levels
- - Compost Aeration & Compost Tea
- - Diffusers: The Key To Efficient Aeration
- - Dock Bubblers & Deicers
- - Duckweed Control
- - Fountain For Ponds, Lakes & Small Gardens
- - Grease Trap Bacteria & Enzymes
- - Mosquito Control in Ponds
- - Muck: Removing Sludge & Pond Muck
- - Pond Aeration Systems
- - Pond Dyes: Aesthetics & Growth Control
- - Pond Liners
- - Pond Pumps: Submersible & External
- - Pond Winterization: Prepare Your Pond for Winter
- - Septic Bacteria Treatments
- - Solar Aeration, Solar Pumps & Solar Systems
- - Solar Aerator Parts List
- - Solar DC & 12V Pumps
- - Weeds & Eurasian Milfoil
- - Windmill Aeration & Windmill Pumping
- - Winterization of Ponds and Lakes
- - Beneficial Bacteria: Helping A Pond Naturally
- - Algae: Basics of Pond Algae
- - Oxygen Transfer Rates, SOTR & Pumping Rates of Aeration Systems
- - Pond Weed & Algae Control
- - Questions & Answers
- - Waterfalls: Building a Waterfall
- - Weighted Airhose, Airline & Tubing for Ponds
- - Links to Suppliers & References
- Consultations & Design Assistance
- Books & Guides
- Links & Resources
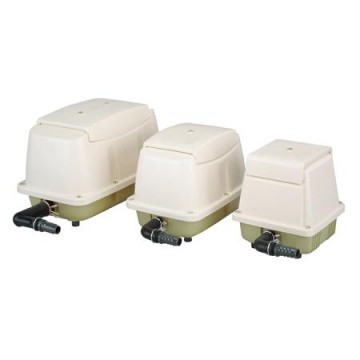
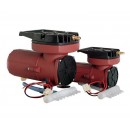
Medo® Silent Linear Piston Air Compressors for Aeration
Product Code: MEDO-USA Linear Piston Air Compressors
Availability: In Stock
Free shipping in the USA.
Free Shipping in the USA
Medo® USA Linear Piston Air Compressors
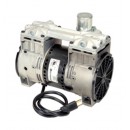
These are not linear "diaphragm," but true linear "piston" type pumps. Since the only moving part—the piston—floats on a bed of air, a exceptionally long service life can be expected (8 years of continuous life is not uncommon). You will experience exceptionally quiet, energy-efficient operation and clean, oil-free air. An outdoor-rated housing, a grounded power cord, 3/4" hose barb and 115V/60 Hz are all standard. UL-listed. Three-year warranty.
- Extremely quiet.
- Outdoor-rated housing.
- True linear piston.
- Exceptionally long service life.
-
Outstanding energy efficiency.
Available Models
Medo ML60
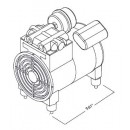
Outdoor Use, 8' max depth, 12" x 8.5" x 7.5", 60 running watts, 2.5 CFM Open Flow, 3/4" outlet
Medo ML80
Outdoor Use, 8' max depth, 12" x 8.5" x 7.5", 86 running watts, 3.0 CFM Open Flow, 3/4" outlet
Medo ML100
Outdoor Use, 9' max depth, 12" x 9" x 9", 95 running watts, 4.6 CFM Open Flow, 1" outlet
Medo ML120
Outdoor Use, 9' max depth, 12" x 10.5" x 10", 118 running watts, 5.2 CFM Open Flow, 1" outlet
Melo ML200
Outdoor Use, 10' max depth, 12" x 10.5" x 10", 215 running watts, 9.9 CFM Open Flow, 1" outlet
Performance
| Model | Watts (115 volts) | CFM Air Flow @ Water Depth in Feet |
PSI max. |
Weight | Outlet | ||||||
| 0' | 2' | 4' | 6' | 8' | Max Depth | ||||||
| PR-ML60 | 60 watts | 2.5 | 2.4 | 2.3 | 1.4 | 0.5 | 8' | 3.5 | 13 lbs | 3/4" | |
| PR-ML80 | 86 watts | 3.0 | 2.9 | 2.8 | 2.1 | 1.2 | 8' | 3.5 | 14 lbs | 3/4" | |
| PR-ML100 | 95 watts | 4.6 | 4.5 | 4.2 | 3.7 | 1.8 | 9' | 4.0 | 22 lbs | 1" | |
| PR-ML120 | 118 watts | 5.2 | 5.1 | 4.8 | 4.5 | 2.6 | 9' | 4.0 | 22 lbs | 1" | |
| PR-ML200 | 215 watts | 9.9 | 9.1 | 8.4 | 7.3 | 6.0 | 10' | 4.4 | 28 lbs | 1" | |
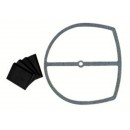
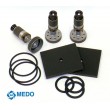
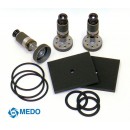
**The recommended operating ranges, to increase diaphragm longevity, are in the shaded zones. Rebuild kits available.
Installation Instructions When Using With Aeration :
**Diffusers, Hose, etc, are sold separately.
1. The first step of installation is to attach one end of the tubing to the compressor. Some tubing will attach directly to the compressor, other sizes may need to use the short piece of rubber hose that is included with the compressor. If tubing is connected directly, simply slide tubing onto outlet of compressor and clamp. If an adapter hose is needed, slide one end onto compressor and clamp - the other end can be connected to the tubing using an adapter so the two sizes will hook to each other.
2. Before attaching the other end of the tubing to the air diffuser, trim the tubing to your desired length. Once trimmed you can attach the tubing to your diffuser and secure with a clamp. You may have to add weights to the tubing to get it to sink. If you purchased self weighted tubing then you will not need to add weights.
3. Install the diffuser in the location of choice in your pond. Note: In freezing climates it is recommended that you do not locate the diffuser in the deepest part of the p ond — this is the warmest water in freezing conditions and should not be disturbed.
4. Put the air compressor in a location so that it cannot fall into the water. While the compressors are weath - er resistant, it is still advised that you shelter your compressor from the elements. Direct rain and snow may shorten the life span of the unit. Note: In the winter damp air can condense on the inside wall of the hose. This can eventually block the hose completely, it is important to check the hose frequently during freezing temperatures.
For your protection - always unplug the unit from its power source before installing or servicing. Should the unit appear not to be working, do not attempt to reach, remove or disassemble before disconnecting from the power source.
1. This pump is solely intended to pump air. Do not use for oil, solvents or any petroleum products (gasoline, diesel, etc.).
2. Always use a properly grounded AC outlet. Do not immerse the pump's plug in water or attempt to plug in a wet plug.
3. Provide a “drip loop” for the line cord. This is a loop in the cord below the level of the receptacle or plug that prevents water from traveling along the cord into the receptacle.
4. Be sure that a Ground Fault Circuit Interrupter (GFCI) is installed in the branch circuit supplying the aquari - um, fountain or pond equipment.
5. Never remove the ground pin from the plug. Note: A multiple valve assembly is included for use with aquarium lines, this is an accessory item and can be discarded if not needed.
Write a review
Your Name:Your Review: Note: HTML is not translated!
Rating: Bad Good
Enter the code in the box below:

The Pond Report
Pond Supplies for private pond owners and commercial pond managers.
Pond & lake products and treatments for natural pond care and aquatic management
Fast and free shipping from our Florida, California & Oklahoma Distribution Centers.
ThePondReport.com is a participant in the Amazon Services LLC Associates Program, an affiliate advertising program designed to provide a means for sites to earn advertising fees by advertising and linking to Amazon.com. Read our disclosure policy regarding the affiliations and commercial incentivizations of The Pond Report web site.
© 2006 - 2025

